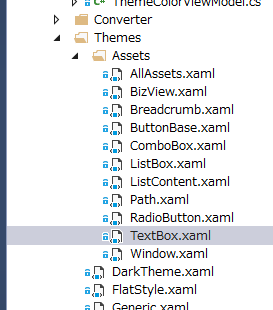
TextBox の Style を Modern Style 対応します。
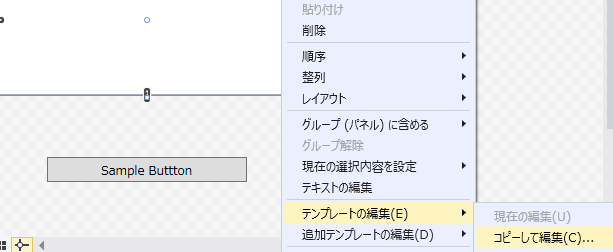
まずは土台を取得したいので、VisualStudio のデザイナ上で TextBox を右クリック
⇒ テンプレートの編集 ⇒ コピーして編集で生成されるテンプレートを利用したいと思います。

ちなみに、現在適用されているデフォルトのテーマで出力されるので、Windows 7 と 8 では違った値がでると思います。
で、8で出力されたのがコレ
1
2
3
4
5
6
7
8
9
10
11
12
13
14
15
16
17
18
19
20
21
22
23
24
25
26
27
28
29
30
31
32
33
34
35
36
37
38
39
40
41
42
43
44
| <SolidColorBrush x:Key="TextBox.Static.Border" Color="#FFABAdB3"/>
<SolidColorBrush x:Key="TextBox.MouseOver.Border" Color="#FF7EB4EA"/>
<SolidColorBrush x:Key="TextBox.Focus.Border" Color="#FF569DE5"/>
<Style x:Key="TextBoxStyle1" TargetType="{x:Type TextBox}">
<Setter Property="Background" Value="{DynamicResource {x:Static SystemColors.WindowBrushKey}}"/>
<Setter Property="BorderBrush" Value="{StaticResource TextBox.Static.Border}"/>
<Setter Property="Foreground" Value="{DynamicResource {x:Static SystemColors.ControlTextBrushKey}}"/>
<Setter Property="BorderThickness" Value="1"/>
<Setter Property="KeyboardNavigation.TabNavigation" Value="None"/>
<Setter Property="HorizontalContentAlignment" Value="Left"/>
<Setter Property="FocusVisualStyle" Value="{x:Null}"/>
<Setter Property="AllowDrop" Value="true"/>
<Setter Property="ScrollViewer.PanningMode" Value="VerticalFirst"/>
<Setter Property="Stylus.IsFlicksEnabled" Value="False"/>
<Setter Property="Template">
<Setter.Value>
<ControlTemplate TargetType="{x:Type TextBox}">
<Border x:Name="border" BorderBrush="{TemplateBinding BorderBrush}" BorderThickness="{TemplateBinding BorderThickness}" Background="{TemplateBinding Background}" SnapsToDevicePixels="True">
<ScrollViewer x:Name="PART_ContentHost" Focusable="false" HorizontalScrollBarVisibility="Hidden" VerticalScrollBarVisibility="Hidden"/>
</Border>
<ControlTemplate.Triggers>
<Trigger Property="IsEnabled" Value="false">
<Setter Property="Opacity" TargetName="border" Value="0.56"/>
</Trigger>
<Trigger Property="IsMouseOver" Value="true">
<Setter Property="BorderBrush" TargetName="border" Value="{StaticResource TextBox.MouseOver.Border}"/>
</Trigger>
<Trigger Property="IsKeyboardFocused" Value="true">
<Setter Property="BorderBrush" TargetName="border" Value="{StaticResource TextBox.Focus.Border}"/>
</Trigger>
</ControlTemplate.Triggers>
</ControlTemplate>
</Setter.Value>
</Setter>
<Style.Triggers>
<MultiTrigger>
<MultiTrigger.Conditions>
<Condition Property="IsInactiveSelectionHighlightEnabled" Value="true"/>
<Condition Property="IsSelectionActive" Value="false"/>
</MultiTrigger.Conditions>
<Setter Property="SelectionBrush" Value="{DynamicResource {x:Static SystemColors.InactiveSelectionHighlightBrushKey}}"/>
</MultiTrigger>
</Style.Triggers>
</Style>
|
訂正
よくみると、IsInactiveSelectionHighlightEnabledなので、フォーカスが外れた際のアクティブでない選択した項目の背景 でした・・・。
VisualStudio先生、すみませんでした。
VS2013 Update 4 ですが、自動生成した MultiTrigger の Condition の設定値が実は逆というバグは愛嬌ということで(ニコッ)
まず、シンプルなのが一目でわかります。
Triggerも非活性時には不透明度を設定することでそれっぽく見せるなど、小粋です。
リソースのキーが x:Key="TextBox.MouseOver.Border" とか x:Key="TextBox.Focus.Border" など、.で区切るところが
個人的にとても気に入りました。
ちなみに、ほとんど変える箇所はなく、現在 Background や Foreground が静的参照なので、これを
アプリケーションで統一的なキーに DynamicResource で置き換えるだけです。
WPFの組み込みコントロールで、特にLOB開発に利用するコントロールなどは限られているので、
こんな感じで、技術資産をためていくと、後の開発で楽にガバナンスを効かせられます。

で、作成したのがコレ。
1
2
3
4
5
6
7
8
9
10
11
12
13
14
15
16
17
18
19
20
21
22
23
24
25
26
27
28
29
30
31
32
33
34
35
36
37
38
39
40
41
42
43
44
45
46
47
48
49
50
51
52
|
    <Style TargetType="{x:Type TextBox}">
        <Setter Property="Background"       Value="{DynamicResource TextBox.Background}"/>
        <Setter Property="BorderBrush"      Value="{DynamicResource TextBox.BorderBrush}"/>
        <Setter Property="Foreground"       Value="{DynamicResource AppForeground}"/>
        <Setter Property="BorderThickness"  Value="1"/>

        <Setter Property="KeyboardNavigation.TabNavigation" Value="None"/>
        <Setter Property="HorizontalContentAlignment"       Value="Left"/>
        <Setter Property="FocusVisualStyle"                 Value="{x:Null}"/>
        <Setter Property="AllowDrop"                        Value="true"/>
        <Setter Property="ScrollViewer.PanningMode"         Value="VerticalFirst"/>
        <Setter Property="Stylus.IsFlicksEnabled"           Value="False"/>
        <Setter Property="Template">
            <Setter.Value>
                <ControlTemplate TargetType="{x:Type TextBox}">
                    <Border x:Name="border" BorderBrush="{TemplateBinding BorderBrush}"
                            BorderThickness="{TemplateBinding BorderThickness}" Background="{TemplateBinding Background}" SnapsToDevicePixels="True">
                        <ScrollViewer x:Name="PART_ContentHost" Focusable="false"
                                      HorizontalScrollBarVisibility="Hidden"
                                      VerticalScrollBarVisibility="Hidden"/>
                    </Border>
                    <ControlTemplate.Triggers>
                        <Trigger Property="IsEnabled" Value="false">
                            <Setter Property="Opacity" TargetName="border" Value="0.56"/>
                        </Trigger>
                        <Trigger Property="IsMouseOver" Value="true">
                            <Setter Property="Background" TargetName="border" Value="{DynamicResource TextBox.MouseOver.Background}"/>
                        </Trigger>
                        <Trigger Property="IsKeyboardFocused" Value="true">
                            <Setter Property="BorderBrush" TargetName="border" Value="{DynamicResource TextBox.Focus.Border}"/>
                        </Trigger>
                    </ControlTemplate.Triggers>
                </ControlTemplate>
            </Setter.Value>
        </Setter>
        <Style.Triggers>
            <MultiTrigger>
                <MultiTrigger.Conditions>
                    <Condition Property="IsSelectionActive" Value="true"/>
                </MultiTrigger.Conditions>
                <Setter Property="SelectionBrush" Value="{DynamicResource TextBox.SelectionBrush}"/>
            </MultiTrigger>
            <MultiTrigger>
                <MultiTrigger.Conditions>
                    <Condition Property="IsInactiveSelectionHighlightEnabled" Value="true"/>
                    <Condition Property="IsSelectionActive" Value="false"/>
                </MultiTrigger.Conditions>
                <Setter Property="SelectionBrush" Value="{DynamicResource {x:Static SystemColors.InactiveSelectionHighlightBrushKey}}"/>
            </MultiTrigger>
        </Style.Triggers>
    </Style>
|
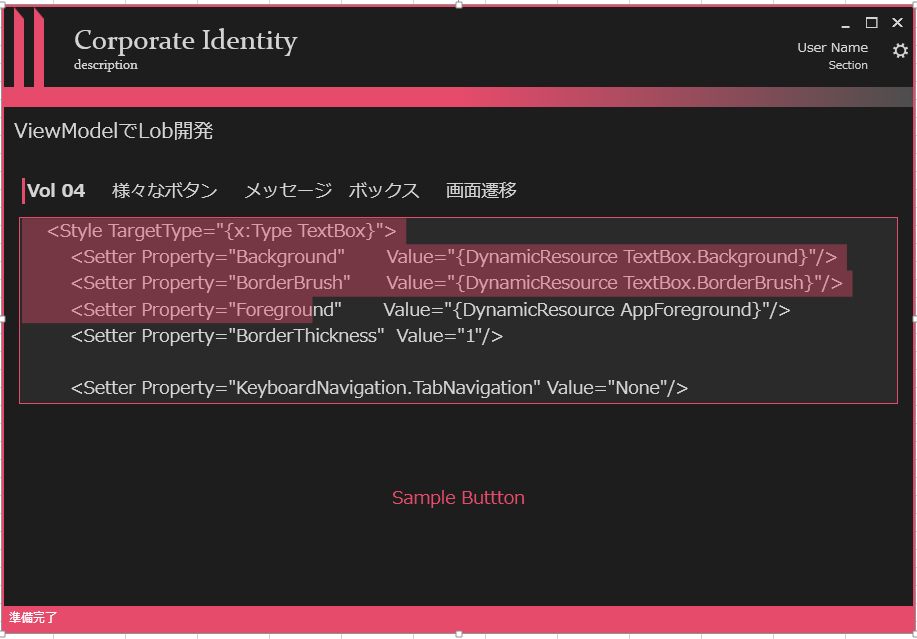
TextBoxまで作成すると、背景色を白ベースか黒ベースかという選択肢も追加できます。
テキストボックスの選択している箇所がブランドカラーになるのも美しいです。

TextBoxなどはまだ簡単なのですが、ラジオボタン、コンボボックスとなるにつれて、VisualStudioが自動生成してくれる
テンプレートが挑発的です。
次回は、ラジオボタンを紹介します。


